
Now it’s time to add some login functionality to our rails application.
Sidebar: Using Git
I’ll be using the git subversion control system throughout this tutorial, but you don’t have to. Michael Hartl talks uses it throughout the Rails tutorial (available for free online) or you can search for it.
git checkout -b part-3-login
What is authentication?
Authentication is the process of confirming a user’s identity. It’s what happens when a user “logs in” to an application (or at least it’s what should happen).
We need authentication to ensure that only a trusted user can use the features of our applicaiton. We don’t want just anybody being able to use it.
Introducing Devise
To facilitate the use of authentication, we’re going to use a gem called Devise. The other option is to handroll your own authentication system. The Devise homepage warns you to use to not use Devise if this is your first rails application. If you want to handroll your own authentication system, Michael Hartl covers this nicely in his Rails Tutorial. I’m going to use Devise, partly because I haven’t played with it too much, and partly just for fun.
Installing Devise
Step 1 – Modify your gemfile
Add the following line to your gemfile:
gem ‘devise’, ‘~> 2.1.2’
Step 2 – Run the Devise generator
rails g devise:install
Step 3 – Follow the output instructions from the terminal window
After step 2, you should see some output like the following:
create config/initializers/devise.rb
create config/locales/devise.en.yml
===============================================================================
Some setup you must do manually if you haven’t yet:
- Ensure you have defined default url options in your environments files. Here
is an example of default_url_options appropriate for a development environment
in config/environments/development.rb:
config.action_mailer.default_url_options = { :host => ‘localhost:3000’ }
In production, :host should be set to the actual host of your application.
- Ensure you have defined root_url to *something* in your config/routes.rb.
For example:
root :to => “home#index”
- Ensure you have flash messages in app/views/layouts/application.html.erb.
For example:
<p><%= notice %></p>
<p><%= alert %></p>- If you are deploying Rails 3.1 on Heroku, you may want to set:
config.assets.initialize_on_precompile = false
On config/application.rb forcing your application to not access the DB
or load models when precompiling your assets.
===============================================================================
Condensed version of the terminal window instructions:
Step A
Define a default url option in your environment(s) files. In our case, we’ll only be running this application on our development machine, so all we need to do is add the following to our config/environments/development.rb file:
config.action_mailer.default_url_options = { :host => "localhost:3000" }Step B
Define a root url in your config/routes.rb file:
root :to=>"pages#home"Step C
We have to remember to add some kind of flash messages in app/views/layouts/application.html.erb (more on this later).
For example:
<p class="notice"><%= notice %></p>
<p class="alert"><%= alert %></p>
Step D (optional step, only do if you are deploying on Heroku)
If you are deploying Rails 3.2 on Heroku, you may want to set:
config.assets.initialize_on_precompile = false
On config/application.rb forcing your application to not access the DB
or load models when precompiling your assets.
Step 4 - Generate our user model
rails g devise todouser
Step 5 - Run a database migration
bundle exec rake db:migrate
Looking at our Todouser Model File
If you open up app/models/todouser.rb, you should see a method call up near the top called devise. It looks something like this:
devise :database_authenticatable, :registerable, :recoverable, :rememberable, :trackable, :validatableThis method allows you to choose which modules you want to be available to customize a user’s login experience. For example :database_authenticatable tells Devise to encrypt and store a password in the database. For more information on more options, you can see the devise documentation at the README or rdoc page.
For simplicity’s sake and to keep the project moving along, we’re going to run with the defaults given to us.
Sampling Devise By Adding Some Navigation to Our Application
Eventually, we’ll be using a front-end framework called Twitter Bootstrap to help us make a nice-looking application. For now, though we’ll just lay the groundwork and make do with the following html code. A great tutorial in general on how to add Twitter Bootstrap can be found at the railsapps blog, which is what the following view code is heavily based on.
- Open app/layouts/application.html.erb. Paste in the following code after the tag and before the <%= yield %> tag:
<header class="navbar navbar-fixed-top">
  <nav class="navbar-inner">
    <div class="container">
    <%= render "layouts/navigation" %>
    </div>
  </nav>
</header>- Create a new file app/layouts/_navigation.html.erb. The underscore before “navigation” signifies the user of what is known as a partial. It’s basically a partial piece of code that your app will render/execute within the rest of the code the partial call is placed in. In our case, we will render some navigation links when rails calls our application.html.erb file. Paste the following code in app/layouts/_navigation.html.erb:
<%= link_to "Home", root_path, :class => 'brand' %>

<% if todouser_signed_in? %>
  <ul class="nav">
    <ul class="nav">
      <li>
        <%= link_to("Logout", destroy_todouser_session_path, :method=>"delete") %>
      </li>
    </ul>
  </ul>

<% else %>

  <ul class="nav">
    <ul class="nav">
      <li>
        <%= link_to("Login", new_todouser_session_path) %>
      </li>
    </ul>
  </ul>

<% end %><% if todouser_signed_in? %>
<ul class="nav">
<ul class="nav">
<li>
<%= link_to("Edit account", edit_todouser_registration_path) %>
</li>
</ul>
</ul>
<% else %>
<ul class="nav">
<ul class="nav">
<li>
<%= link_to("Sign up", new_todouser_registration_path) %>
</li>
</ul>
</ul>
<% end %>-
Rename app/public/index.html to index_defunct.html or delete the file. By default rails directs you to this html page when you type in the home url (in our case, http://localhost:3000/) into your browser. If you recall, earlier we added root :to=>”pages#home” in our config/routes.rb file. We want our rails application to use this as our home page by default.
-
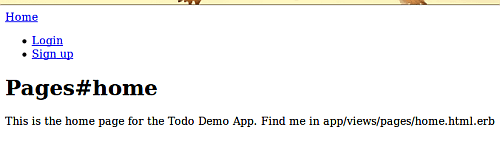
Type rails s at the command prompt. Navigate to http://localhost:3000/ on your development machine (this might be a different URL for Windows users, remember, this tutorial assumes a Linux or Macintosh system). You should see something like the following:
- Now we’ll add the capability for our application to display flash messages. Add the following code to your app/views/layouts/application.html.erb file after the <%= yield %> tag.
<% flash.each do |name, msg| %>
  <%= content_tag :div, msg, class: "#{flash_class(name)}" %>
<% end %>
flash_class(name) is a helper function that we will define in app/helpers/application_helper.rb. Add the following code in application_helper.rb after the line “module ApplicationHelper”:
def flash_class(key)
  case key
  when :notice then "alert alert-info"
  when :success then "alert alert-success"
  when :error then "alert alert-error"
  when :alert then "alert alert-error"
  end
end
We do this in preparation for the integration of Twitter Bootstrap into our application later on.
-
Run bundle exec rake db:migrate to add the appropriate columns to the database so we can store our emails, passwords, etc.
-
Finally, create a user account with your email and password.
Sidebar: Using Git
Finally, we commit our work to git and merge it into the master branch.
git add .
git commit -m “added login functionality”
git checkout master
git merge part-3-login
What we’ve covered so far and where we’re headed
By using devise, we gain the ability to have a user sign in and sign out via a password. Because devise gives us some default configurations out of the box, we don’t have to do too much to add basic authentication functionality to our application. We can play with different settings (such as redirecting to a specific page after signing in) by tweaking some of devise’s settings. The wiki pages for devise are a great resource to get more detail on devise’s capabilities. Now it’s on to letting the user start creating tasks. But first, we have to create some polymorphic associations.
Resources:
- I’m keeping a public repo of this application at my github account. You can download the source code there.
- Rails Tutorial by Michael Hartl